I love using video to get my point across. For me it is much easier then writing or typing. With inexpensive video equipment you can create decent videos to share with your intended audience. Due to the Youtube craze video has became much more of our daily life. Youtube alone serves up over 1.2 billion video files per day. Crazy right? Sounds like an opportunity to me. So if people are reading less and viewing more, one would assume that video is the best way to get a short message across. In this article I am going to walk you through how to take your video and distribute it to a targeted audience.
This last week I attended a bridal show as a vendor. I had a booth set up with my work on display. Sad thing is that I don’t have a decent photo of it to show you. Trust me though, it was a clean set up. The bridal show directors had asked me if I would shoot their runway fashion show which pulled me away from my booth leaving my wife and assistant there to meet new clients. Those of you who know me know how personable I am and that missing an opportunity to meet people face to face is a big deal. After the bridal show the vendors were all given lists of the attendees including contact information and email address. An old school mentality would suggest that I open Photoshop and create a fancy snail mailer to send to these 100 brides who are currently planning their weddings that will take place between this year and 2011. Since I live in “the now” I decided to put together a short video to send to these brides.
The problem with video in email is that I have no clue or control over what my email recipients will be viewing their email in. If they are on a Mac or a newer PC I could embed or attach the video into the email and it would show up and play right from with in the email. Since I do not want to leave it up to chance I will take a different approach. The last thing I want a bride to see is an email with a bunch of video embed code in it, which of course would look very unprofessional and warrant a click to the delete key. However, inserting images into email is not new technology and is supported by most email clients installed on computers over the last several years. Even email browser solutions such as Gmail and Hotmail allow for images to be embedded using HTML code. You are probably wondering why I am talking about images when I have already mentioned that I recorded a video. We are going to use a still frame from the video to embed in our email as an image. That image will link to our video which will be embedded in a website. When the email recipient clicks on the image in our email in an attempt to play the video, the Video URL that the image is linked to will open up in a web browser and the video will play. I may have just confused you so bare with me.
So now that we have decided that we will be embedding an image into our email instead of a video I will explain how this is going to work.
Recording Your Video
This tutorial is not going to explain how to shoot a video, upload it to your computer, edit it and place it online. There are tutorials all over the web for that. Do some Google searching to find some how to videos on video capture and editing.
Where Should I Upload My Video?
I have chosen to embed the video into my website. You can upload your video to Youtube if you do not care who sees this video. If you only want people to see the video that received this email or landed on your website I would suggest you use Vimeo. In a Vimeo account you can set privacy settings to your video only allowing it to play with in your website. The video will not be able to be found on Vimeo.Com, it will remain private on their website. I explain the process of setting up private video in another tutorial called, “Using Vimeo To Embed Private Video On Your Website.”
Should I Use An Email Campaign Management Service?
I use MailChimp.Com. Mailchimp is the best email campaign marketing solution I have found to date. Their system is easy to use. In a matter of minutes you can set up an email list by importing the recipients email addresses and set up a custom email campaign. MailChimp offers a free account to try out their services. The free account allows you to send emails up to 500 people. For the first month I used MailChimp I had a free account. Now I am at their first payment plan level which is $30. I am managing over 1500 email addresses in 6 different lists. $30 is not bad for what I am getting. Also, from what I understand, if you use this link and sign up. MailChimp will credit your account $30 and my account $30.
MailChimp: “Every time you refer new MailChimp customers, we’ll add $30 in MonkeyReward credits to their account, and to your account. Everybody wins!”
The reason I use a Email Campaign Management Service, such as MailChimp, is that you get reporting back on how your email campaign is doing. Most of the services out there also provide a web version of your email if for some reason they can not view it correctly in a browser. This is important for our friends who are still rocking older versions of Windows. Like I said before, I do not want to leave my emails up to chance. Mailchimp is always testing to make sure that the emails sent will display correctly. If you really want to take your marketing serious I suggest you get a MailChimp account today. All of my marketing related emails are Powered by MailChimp!
Let’s Get Started!
Step 1: Open Your Video In A Media Player.
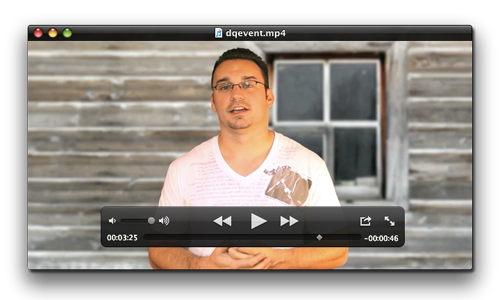
We are going to grab a single frame from the video which will be the image we will include in our email campaign. There are a few ways to accomplish this. You can get just a still frame from the video in most video editors. Do a Google search to see how to do this in your video editor. I decided to open my video in Quicktime on the Mac. I decided to grab a screen capture of the Quicktime Video window which would prompt a person to click as if it would play. I opened the video, scrobbled to the frame I wanted to save as an image and used the following keyboard shortcut: “Command Shift 4” Once you do this you will see your cursor change to a small target. Mouse over the Quicktime video and hit the spacebar. You will now see the target turn into a small camera. Click on the Quicktime video window and a snapshot of that window will be saved to your desktop. I am sure the PC works a bit different so if you are on a Windows machine and figure out how to do this, please post it in the comments section below.
I took my snapshot of the video and opened it in Photoshop, added a drop shadow to make it pop and saved it as a JPG. This is completely optional however I do suggest that you resize the image so it fits the width of your email and that you save it as a JPG. The screen capture that the Mac will give you is a PNG file. Our friends on older PC’s will not be able to view PNG files.
Step 2: Create A New Email Message in MailChimp.
After you create your MailChimp account I suggest watching their video tutorials that will teach you everything you need to know about using their service. Remember, it’s free.
Link: http://www.mailchimp.com/support/videos/
Step 3: Test Your Email
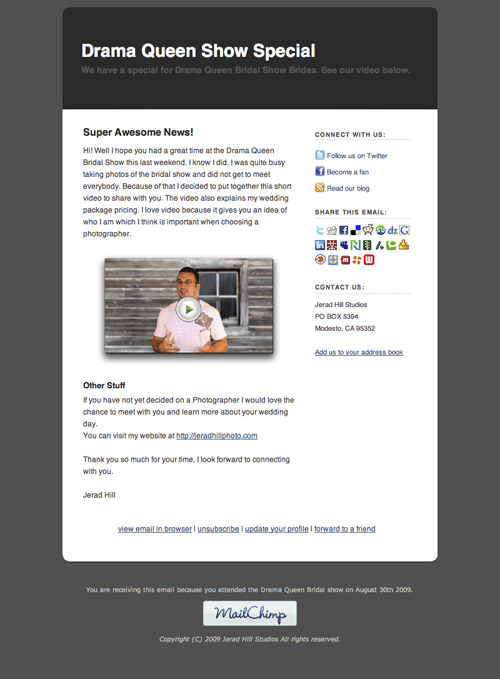
MailChimp allows you to send a test email. I suggest you do this. Here is a snapshot of what my email looks like so far.
Step 4: Send or Schedule Your Email
Another nice option with MailChimp is the ability to schedule emails to send at a later date. I have set my email to send to my recipient list at 7am so it will be at the top of the list in their mailbox when they check their email in the morning.
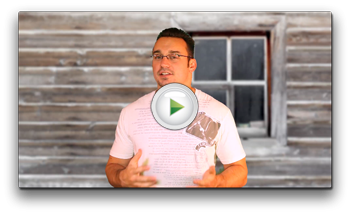
The link image link that we created in the email to look like a video will actually open up the video in a browser. Go ahead and give it a try. Click the image below this text, it will operate the same way from with in the email by opening up in a new browser window.
Remember to sign up for MailChimp to get a free membership and a $30 credit to your account. Click the MailChimp logo below to sign up and start working on your email campaigns right away.


I think your link to your video has been hacked