Today I am at TWTRCON in SF which is a Twitter Conference geared toward using Twitter in business. I attended this event last year in 2009 and ended up being the unofficial event photographer. I live blogged the event last year, which was actually pretty fun. This year I was asked to be the event photographer so I thought it would be fun to talk about my process and how I was able to take photos and live tweet as the event happens. I will also outline a few things that didn’t work as I prepared for today.

So how do I cover an event, live post images and write a blog about it all at the same time?
First I will start with what didn’t work, the Eye-Fi cards. Eye-Fi cards are SD cards that can connect to wireless networks. These cards are suppose to allow you to transfer images to your computer and then autopost them to a sharing service. I wanted to take pictures and have them automatically show up on Twitter. This just so happened to be one of the features they promote themselves as having. Upon testing this out it was a pain to set up. Two hours of tech support on the phone could not resolve my issues. I finally got it to work this morning but all it did was Tweet a link to the image gallery. I wanted links to each photo individually. Needless to say I decided to ditch the Eye-Fi cards and go back to regular SD cards.

I decided that I would just capture photos, transfer them to my laptop and upload them. My search was now on for a quick process to apply to the photos and get them online. This could be a time consuming process but it ended up being super easy. Let me share with you how I did this.
Step 1: Take Photos
I decided to capture a 1/2 session and then go back and upload. The viewers on Twitter don’t really know which frozen moment in time is being shown to them, it’s just important to see them while the speakers are still up there. I spent the first half of each session capturing photos.
Step 2: Import Photos
I insert the memory card into my laptop and drop the files into a folder on the desktop. Lightroom is opened and configured to automatically import files that are dropped into that folder. This allows me to quickly get the images off my card and get the card back in my camera. As the images import into Lightroom there is a Lightroom preset adjustment ran on each image and a color correction. This all happens with out me clicking a button. It’s all automated.
Step 3: Tag my Favorites
I then quickly tag my favorites. Most of them do not need cropping but on occasion I will crop a few of them to make the overall photo look a bit better.
Step 4: Upload
I select the photos I want to upload from that session, hit Command, Shift and E to export. I am using a plugin for Lightroom that exports photos to Twitpic. Twitpic auto posts images to Twitter and is one of the standards for sharing images on Twitter. The Plugin requires initial setup to your Twitter account. You can enter a message that you want sent with the Tweet. It is pretty awesome. The plugin cost me $3.50 USD, way less than an Eye-Fi card. The plugin exports each photo and sends them to Twitpic individually which then posts the Tweet to the account you entered when setting up the plugin. #AWESOME
Step 5: Go back to shooting
Capture the next session and repeat my process over again.
The entire process of Step 2 to Step 5 is about 3 minutes if I was to import 50 photos. More details below these photos.

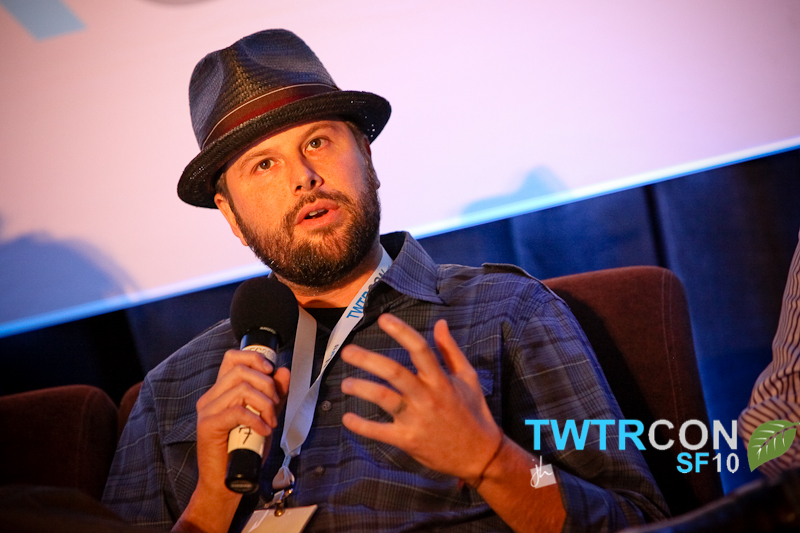


I also had Caleb here helping me shoot outside of the event. There is a foyer with vendors and a place for the attendees to roam around in between sessions. Caleb is there to capture moments with attendees and vendors. There are a few authors signing books and other well known people who we can capture in images. These photos were uploading using the same process. Some of the time both of us would roam around and get some fun and creative shots to share on Twitter. Below are some photos that Caleb and I took.


Thinking about how things would have went if I was able to auto tweet each photo direct to Twitter using the Eye-Fi cards, I realize that would have worked out much worse. Using the Eye-Fi card everything would go live, even the blinked eye photos or those weird facial expressions you sometimes get on accident. This process is much more efficient and gives me total control. I was even able to throw a B&W adjustment on a couple of the images to make them look even better. I have had several people come up to me and tell me how awesome this is including the host of the event.
Jerad,
Just wondering — what didn’t work with the Eye-Fi Cards? We have TONS of people doing this, everyday, shooting events live, and have taken 100MM+ photos through Eye-Fi Cards in the last few months 🙂
Personally, I use my Droid X, tether through it, and anywhere I go — as long as there’s cell coverage through Verizon (there usually is) — I’m all set. The cards work well, assuming that you’re around good Wi-Fi.
In terms of being selective — you can absolutely be selective, in camera. You can choose either Selective Share or Selective Transfer. Only the images that you tag, IN CAMERA, will get uploaded.
We do not tweet on every photo. It would be too noisy. The tweet goes up when the photo upload sessions ends, after a few minutes. But if you wanted to tweet more often, you could do it through your phone, since you’ll have way more time, if you didn’t have to do all the manual steps you outlined above.
Thx —
Ziv.
Ziv, I appreciate your response. There are several things that I do not like about the setup process of the card for auto posting. It is not set up in a way that a person could shoot and publish with in a 5 minute span which is what I was looking for. I was using my Android phone and tethering through that. The connection speed was good because I was in the bay area. I know that you can be selective by protecting images in the camera which is what I think you reference as tagging a photo.
For a professional, I don’t think they would want every photo going live online as they were captured. This is not what I wanted. I understand that photos can be tagged by using the selective share option. However I want image that I do select to get uploaded online and then shared on Twitter. Not a link to the gallery where they are all stored but an individual link to each photo that was chosen to be uploaded.
I will still use my Eye-Fi cards from time to time when I am doing something for fun but do not think I could figure out a good way to use them in a live situation. I literally spend hours on the phone with your tech support. Told them what I was going to be doing and that it was for a huge Twitter conference but were unable to get anything to work. Wish it could have worked out. I do feel that the more manual process I listed above gave me more control over the photos and the publishing of them then I could have achieved with an Eye-Fi card.
Thanks again for responding personally, I appreciate that.
Jerad,
Great tip for on spot picture uploads compared to the Eye-Fi Cards, much faster. I was wondering which is the plugin you have used.
Thanks
Kris